Pages

Thursday, March 29, 2012

Guacamole Salad with Josh


Since my very sweet friend gave me some of her genius salsa...for free!...

I went ahead and made Salsa Lime Chicken and Rice again.

Now, a couple observations I made over dinner.

a.) Salsa Lime Chicken and Rice tastes even better with Jan's Salsa!

b.) Nothing goes with SLCR quite as well as this quacamole salad!

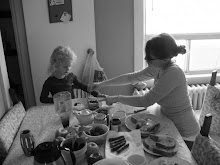
c.) I love Josh and Amy like there's no tomorrow.

So, guacamole salad is everything you would mash into a regular quac.

There's avocado, tomato, lime, some peppers and beans for good measure, you just don't mash it.

The dressing is so simple.

It has loads of lime zest and juice, a bit of olive oil and some salt and cayenne.

Josh and Amy loved it.

See how nicely Josh cleaned his plate.


Guacamole Salad
(Ina Garten)

1 pint grape tomato, halved
1 yellow pepper, diced
1 can (19 oz) black beans, rinsed and drained
1 jalapeno pepper, minced (optional)
1 lime zested and juiced (about 1/4 C juice)
1/4 C extra virgin olive oil
1 tsp kosher salt
1 garlic clove, minced
dash cayenne
1/2 tsp pepper
2 avocados, peeled and diced

Place the tomatoes, yellow pepper, black beans, jalapeno peppers, and lime zest in a large bowl. Whisk together the lime juice, olive oil, salt, black pepper, garlic, and cayenne pepper and pour over the vegetables. Toss well.

Just before you're ready to serve the salad, fold the avocados into the salad. Check the seasoning and serve at room temperature.

Monday, March 26, 2012

Sprouts II


Our lentils sprouted and we ate them today.

They were delicious with tuna on rye.

Thursday, March 22, 2012

Spring is about to Sprout...


I am by no means a gardener, but I would love my kids to try and acquire a bit of a Green Thumb.

Today we started some bean plants and lentil sprouts using these video's instructions.

and this Usbourne book about the Seasons.

We are going to take pictures as the plants/sprouts grow.

Tuesday, March 20, 2012

Rich Chocolate Brownies with a Surprise


These are the best brownies I have ever had!

I think everyone has their own description of a perfect brownie.

Still, I think these brownies would make anyone happy.

Ok, confession...I have a new cookbook.

It's such a good one, too!

One of my favourite Canadian cooks, Julie Van Rosendaal has just put out a new book called, Spilling the Beans.

These brownies were in the dessert section.

Yep, they're black bean brownies.

You won't know those beans are even in there!

Truly, you wont.


Black Bean Brownies
(Spilling the Beans by Julie Van Rosendaal)

1 C rinsed and drained black beans
1/2 C butter
2 oz good dark chocolate
1/3 C flour
pinch of salt
2 large eggs
3/4 C sugar
1 tsp vanilla
2/3 C chocolate chips

Preheat oven to 350*.

Spread the rinsed beans on a paper towel and blot dry. Reserve on the towel until you need them.
In a double boiler (or in the microwave) melt the chocolate and butter together. Don't burn it.
Whisk to combine and cool a few minutes.
In a medium bowl, whisk flour and salt together. Set aside.

Place beans and cooled chocolate mixture in a food processor, process until very smooth. Scraping down the bowl a few times.
Add the eggs, sugar and vanilla. Process again.

Fold gently into the flour mixture, leaving streaks of flour still visible.
Add chocolate chips and fold again.

Pour batter into an 8 inch square pan that has been greased.

Bake 25-28 minutes.
Cool and cut.
Store in the fridge to maintain the dense texture and leave out for softer brownies.


Thursday, March 15, 2012

Paillards of Chicken with Cherry Tomatoes

Lately, I have been doing a lot of quick meals.

Tonight was different.

I felt like spending a little longer in the kitchen and making something special.

Everything about this whole meal is pretty and tasty and worth the time invested.

We took a few days off this week in the spirit of March Break.

So since the kids had totally worn themselves out outside and were resting, I had an hour to get dinner ready in a quiet house.

It was special.

Here's what I made.

~Chicken pounded thin, sprinkled with lemon and breaded in fresh white breadcrumbs mixed with herbs.
~Warm buttery tomatoes with ribbons of basil
~Brown rice cooked in some beef stock.
~Very special brownies (that I must share with you)


Paillards of Chicken with Cherry Tomatoes
(Not your mothers weeknight cooking)


4 boneless, skinless chicken breast, pounded thin
Juice of 1 lemon
1/2 cup flour mixed with a pinch of thyme, salt and pepper
2 large eggs, beaten
1 1/2 C fresh white bread crumbs, made in a food processor mixed with a little thyme
2 Tbsp olive oil
24-30 cherry tomatoes, pierced with a knife so they wont pop
2 Tbsp butter
2 Tbsp minced or ribboned basil or parsley
salt and pepper

Sprinkle chicken with lemon juice.
Place flour, and crumbs on plates.
Whisk eggs in a shallow bowl.
Dredge chicken in flour, then dip it into egg and then coat with bread crumbs.

In a large skillet over med-high, heat oil and saute chicken until crispy and golden, 4-5 mins per side.
Remove chicken from pan and keep warm.

For the tomatoes, wipe skillet clean and add butter. Melt butter over med-high and add tomatoes.
Cook tomatoes until warm, tossing with butter, about 1 minute.
Add salt and pepper.
Add basil, toss again.
Serve tomatoes warm with chicken and some brown rice or buttered and herbed noodles.


Wednesday, March 14, 2012

Alphabet Soup

Seeing letters floating around in their food gives my kids so much joy.

They love alphabet soup.

This is one of my favourite soups because of the simplicity of its method.

You will hardly need to think about it.

Cut up a whole bunch of veg, whatever you like, and throw it into some stock, boil, season and simmer.

Done.

Which is perfect on a day like today because who wants to be inside when it's warm and sunny outside.

We did everything outside today.

We raked, shoveled dirt, swept, read and did some bike riding.

Spring is very near.

Alphabet Soup
(Not Your Mother's Weeknight Cooking: by Beth Hensperger)

**I like to freeze this soup in small lunch size portions enough for the kids and I. That way, we can pull one out for lunch on a whim- instead of opening a can.

One 28 oz can of diced tomatoes
6-8 cups stock
2 medium carrots, chopped
1 medium onion, chopped
2 stalks celery, chopped
2 potatoes, diced
1 C diced green beans
1 C frozen corn
1 C frozen petite peas
1 clove garlic, minced
1/2 tsp salt
black pepper
1/2 tsp marjoram
1/2 tsp thyme
1/2 C alphabet pasta or any other mini pasta shape

In a large stock pot over med-high heat, combine tomatoes, in their juice and stock; bring to a boil. Add all vegetables and seasonings.
Boil again.
Reduce heat and simmer 40 mins.
Add pasta and cook about 5 mins.
Serve immediately.
Serves 4.


Tuesday, March 13, 2012

Baked Potato and Tomato

Here's a simple side dish you could put with almost anything.

With fresh, summer tomatoes right out of the garden, this dish would be at its best.

Even so, with some large hot house tomatoes and a few potatoes, this is full of flavour and really satisfying.

Resist the urge to change it first time around and I think you'll see the simplicity of the ingredients and seasonings are perfect.


Baked Potato and Tomato
(Company's Coming:The Potato Book)

3 lbs Potatoes (6 medium)
4 medium tomatoes, sliced
3-4 medium onions, sliced
3/4 C monterey jack or cheddar cheese, grated
1/2 C grated parmesan
3/4 tsp dried oregano
3/4 tsp dried basil
1 tsp salt
1/2 tsp pepper
1/2-1 C mozzarella cheese, grated

Layer 1/2 of first 3 ingredients in a greased 4 quart casserole dish.
Sprinkle with Monterey Jack or Cheddar cheese.

Mix parmesan, oregano, basil, salt and pepper in a small bowl.
Sprinkle 1/2 over the Jack cheese. Layer second 1/2 of vegetables over the top. Sprinkle with second half of parmesan herb mixture.

Scatter mozzarella cheese on top.
Cover with foil or lid and bake at 400*F for 50 minutes.
Remove foil and bake 10 more minutes or until potatoes are tender.

Serves 8


Monday, March 12, 2012

Teriyaki Salmon with Sesame Noodles

My kids love salmon.

However, I need to be very creative to get Jim to eat it.

He loves this teriyaki salmon.

The fishiness of the salmon seems to be completely cut by the sour rice vinegar and the sweet apple juice.

Your run of the mill bottled teriyaki sauce is probably all sugar.

What I love about this is that it's not sickeningly sweet.

I serve it with simple sesame noodles mixed with carrot, green onion and cucumber.


Teriyaki Salmon with Sesame Noodles
(Fish is from: Not Your Mother's Weeknight Cooking/
the noodles are adapted from thekitchn.com)

Salmon
One 2 inch piece fresh ginger, peeled and cut in pieces
2 garlic cloves
1 can frozen sugar-free apple juice concentrate (I use NoName)
1/2 C low sodium soy sauce or shoyu sauce
3 Tbsp rice vinegar
1/2 C chopped green onion
4 -6 1 inch thick salmon filets

Noodles
2 bundles soba noodles
2-3 carrots cut into match sticks (you could grate it too, just dont bother blanching if you do)
1/2 cucumber, in thin rounds or long ribbons
2 green onions, thinly sliced
1 Tbsp sesame oil
1 1/2 Tbsp soy sauce
1/2 Tbsp honey (optional)
2 Tbsp rice wine vinegar
a few dashes hot sauce

For the fish:
Place fish in a 9x13inch baking dish.
Preheat oven to 350.
In a food processor, whiz until garlic and ginger are very finely chopped.
Add apple juice concentrate, soy and vinegar. Whiz again.
Stir in onion.
Pour over fish. Cover with plastic and refrigerate 30mins.
Bake fish 10-15 minutes or until fish is firm.

For the noodles:
Boil noodles 6 minutes and then drain and rinse with cold water.
Pour noodles into a large bowl.
Blanch carrots in a little boiling water for 1 minute. Add to noodles with cucumber and onion.
In a small bowl, whisk together sesame oil, vinegar, honey, soy and hot sauce.
Pour over noodles, cover with plastic and reserve until fish is ready.
Room temperature noodles are fine.

Serve Noodles topped with fish, teriyaki sauce and a few more bits of green onion.

(Dad, avert your eyes from Jimmy's hand...seriously, it's for your own good...)

Saturday, March 10, 2012

End of the Week Frittata

We could easily eat eggs everyday.

Eggs boiled, fried, in-a-hole, scrambled, in a salad, quiche and, often, frittata.

What I love about a frittata is its versatility.

Use whatever is in season and whatever you have in your fridge...it's a good end-of-the-week dinner.

The basic parts to this are vegetables, egg and cheese.

This week I had a bunch of asparagus, a few potatoes, some chives and a piece of parmesan.

I love vegetarian frittata but if you had some bits of ham or chicken, you could throw that in too.

I make this for dinner if I know we are going to be out all day and will be getting home right at dinner time.

It's quick.

A few combos we love are: Broccoli + Cheddar
Bacon + Mushroom + Mozzarella
Zucchini + Feta
Roasted Red Pepper + Goat

Serve this with a green salad (a tomato salad in the summer) and some greek pitas warmed, spread with butter.

End of the Week Frittata
(adapted from: super natural everyday by Heidi Swanson)
Serves: 6

2 Tbsp Extra Virgin Olive oil or butter (I did 1Tbsp of each)
2 small onions, minced
2 medium potatoes, sliced paper thin
1 bunch asparagus, about 20 stalks, in 1 inch pieces
salt pepper
10 eggs
1 cup cottage cheese (optional)
1/3 cup freshly grated parmesan cheese
2 Tbsp chopped chives

Heat the oil or butter in a heavy ovenproof 12-inch (30 cm) skillet over medium-high heat. Stir in the onions and potatoes and two big pinches of salt. Cover and cook, stirring occasionally, until the potatoes are just cooked through, about 5 minutes.

Stir in the asparagus and cook for another minute or two, until they soften up a bit.

Whisk ½ teaspoon salt and cottage cheese into the eggs and pour the eggs into the skillet.

Cook over medium-low heat until the eggs are just set and there isn’t a lot of liquid in the pan, about 5 minutes. To help this along, run a spatula underneath the frittata and tilt the pan so the uncooked eggs run to the underside.

Sprinkle with parmesan cheese.

Place under a broiler for a couple of minutes, or just until the top of the frittata is puffed up and set. Keep an eye on it the whole time or it will burn!


Friday, March 9, 2012

Cinnamon Crunch Raspberry Muffins


We had a visit from good friends yesterday. What a treat.

Clara and I thought it would be fun to make some pretty, raspberry studded, strusel topped muffins.

After a lot of Twister playing, tree climbing, dress up and chatter we all ate the muffins.

The kids loved them and because the recipe makes a lot, we all ate several.

Cinnamon Crunch Raspberry Muffins
(dairygoodness.ca)
Yield: 24 muffins

1 1/2 cups all-purpose flour
1 1/2 cups whole wheat flour (I used spelt flour)
2 tsp baking powder
1/2 tsp baking soda
1/2 tsp salt
2/3 cup packed brown sugar
1 egg
1 1/2 cups milk
1/4 cup butter (I used olive oil)
2 tbsp freshly squeezed lemon juice
2 tsp vanilla extract
2 cups fresh raspberries

1/3 cup packed brown sugar
1/3 cup rolled oats or spelt flakes
1 tsp ground cinnamon
1 tbsp freshly squeezed lemon juice or orange juice


Preheat oven to 375 °Butter 12 nonstick muffin pans or line with paper liners.

In a bowl, combine sugar, oats, cinnamon and lemon juice; set aside.

In a large bowl, combine all-purpose and whole wheat flours, baking powder, baking soda and salt.

In another bowl, whisk together sugar, egg, milk, butter, lemon juice and vanilla extract. Pour over dry ingredients and sprinkle with raspberries; stir just until moistened.

Spoon into prepared muffin pan, smoothing tops; sprinkle evenly with topping. Bake for 20-25 min or until tops are firm to the touch. Let cool in pan for 10 min. Transfer to rack to cool completely.

Thursday, March 8, 2012

An Old Standby and A New Favourite


No Knead Dutch Oven Bread, that so many people rave about, deserves all the accolades.

It comes together with little effort and has wonderful texture and taste.

We have been eating it for breakfast toasted and buttered with scrambled eggs.

Toady I cut a slice to go with my favourite lunch of chickpea-lemon salad.

You'll need to plan ahead with this bread, it isn't instant but its very low-effort...

fun, even!...

Alicia, from the posy gets cozy blog, adds cinnamon and raisins to the dough. (I'm trying that next time.)

No-Knead Dutch Oven Bread
(motherearthnews.com)

1/4 tsp active dry yeast
1 1/2 cups warm water
3 cups all-purpose flour, plus more for dusting. You may use white, whole wheat or a combination of the two.
1 1/2 tsp salt
Cornmeal or wheat bran for dusting

In a large bowl, dissolve yeast in water. Add the flour and salt, stirring until blended. The dough will be shaggy and sticky. Cover bowl with plastic wrap. Let the dough rest at least 8 hours, preferably 12 to 18, at warm room temperature, about 70 degrees.
The dough is ready when its surface is dotted with bubbles. Lightly flour a work surface and place dough on it. Sprinkle it with a little more flour and fold it over on itself once or twice. Cover loosely with plastic wrap and let it rest for about 15 minutes.
Using just enough flour to keep the dough from sticking to the work surface or to your fingers, gently shape it into a ball. Generously coat a clean dish towel with flour, wheat bran or cornmeal. Put the seam side of the dough down on the towel and dust with more flour, bran or cornmeal. Cover with another towel and let rise for about 1 to 2 hours. When it’s ready, the dough will have doubled in size and will not readily spring back when poked with a finger.
At least 20 minutes before the dough is ready, heat oven to 475 degrees. Put a 6- to 8-quart heavy covered pot (cast iron, enamel, Pyrex or ceramic) in the oven as it heats. When the dough is ready, carefully remove the pot from the oven and lift off the lid. Slide your hand under the towel and turn the dough over into the pot, seam side up. The dough will lose its shape a bit in the process, but that’s OK. Give the pan a firm shake or two to help distribute the dough evenly, but don’t worry if it’s not perfect; it will straighten out as it bakes.
Cover and bake for 30 minutes. Remove the lid and bake another 15 to 20 minutes, until the loaf is beautifully browned. Remove the bread from the Dutch oven and let it cool on a rack for at least 1 hour before slicing.


P.S--Wasn't yesterday wonderful.

We spent a lot of time at the park, opened all the widows and savoured the warmth.

Wednesday, March 7, 2012

Olive Oil and Maple Granola

Today the kids were having grilled cheese on rye with grapes and vegetables.

I decided to top some amazing maple-walnut granola, made from this great recipe, with vanilla yogurt and chopped banana.


My usual granola has been made and loved and made and loved dozens of times.

I needed a little change.

This one is very similar to my standby but it has a few things that set it apart.

It is very crisp and bright in flavour.

I hate, break-your-teeth-hard granola...who wants that, seriously?

This is more of a potato chip crunchy. I love that...(no dental stress.)

Aside from it's great texture, it also tastes so good with all that maple in there.

Oh how I love maple...but that's another story.

Olive Oil and Maple Granola
(food52.com)

3 cups old-fashioned rolled oats

1 cup raw pumpkin seeds, hulled

1 cup raw sunflower seeds, hulled

1 cup unsweetened coconut chips

1 1/4 cup raw pecans, left whole or coarsely chopped (I used walnuts)

3/4 cup pure maple syrup

1/3 cup extra-virgin olive oil

1/3 cup packed light-brown sugar

Coarse salt

Heat oven to 300 degrees.
Place oats, pumpkin seeds, sunflower seeds, coconut, pecans, syrup, olive oil, sugar, and 1 teaspoon salt in a large bowl and mix until well combined.

Spread granola mixture in an even layer on a rimmed baking sheet. Transfer to oven and bake, stirring every 10-15 minutes, until granola is toasted, about 45 minutes.

Remove granola from oven and season with more salt to taste. Let cool completely before serving or storing in an airtight container for up to 1 month.

Tuesday, March 6, 2012

Salsa-Lime Chicken and Rice

Before I tell you about this delicious chicken, I want to tell about this bizarre picture.

A few years ago, Jimmy and I went on a road trip to Savannah, Georgia.

We headed south along the East coast, camped on the Outerbanks, ate some great seafood and met some fascinating people.

On the way home, we collided with this place.

Being at South of the Boarder is a little like being in the twilight zone.

We were pretty sure we wouldn't make it out of there alive.

So we grabbed a sketchy chili dog, took a few creepy pictures and ran for our lives.

Anyway, somehow this chicken and rice dish reminded us of that experience.


This is such an easy one pot meal.

You could easily serve this to company along with some corn bread and a salad.

It would also transport well if you wanted to take it to a potluck dinner or an unwell friend.

I really love this combination of spicy tomato and sweet corn.

The spice level totally depends on the salsa you choose.

For all my clever friends that make salsa...oh, would this be a good application for some of that.

When you serve it up, top the rice with a few squeezes of lime and maybe some sour cream and grated cheddar.

Salsa Lime Chicken and Rice
(adapted from: Everyday Food magazine, Dec 2010)

3lb bone in chicken thighs (skin on if you choose, I removed it)
coarse salt and fresh pepper
2 tsp chicken seasoning (optional)
2 tsp vegetable oil
1 yellow onion, diced small
2 cloves garlic, minced
1 green pepper, diced medium
1 lime zested and juiced
1/2 tsp dried oregano
1 1/2 C basmati or long grain white rice
3 cups frozen corn
1 cup salsa
2 1/2 C chicken stock

Preheat oven to 350*.
Pat chicken dry with paper towels and season both sides with salt and pepper or chicken seasoning.

In a large Dutch oven or heavy lidded pot, heat oil over high heat.
Cook chicken, skin (flesh) side down until golden, about 6 mins. Flip chicken and cook bone side until browned, 6 mins. Transfer to a large plate.

Reduce heat to medium and add onion, garlic and bell pepper to pot.
Cook, stirring and scraping up browned bits until onion is translucent, 4 mins.
Stir in lime zest and juice, oregano and rice, cook 1 minute.

Add corn, salsa, and broth. Season with salt and pepper to taste.
Arrange chicken on top of the rice. Bring to a boil, cover pot and place in oven.
Bake until liquid is absorbed and chicken is cooked through.
About 25 mins.
Let stand at least 5 minutes before serving.
Top with sour cream, lime wedges and cheddar.


Thursday, March 1, 2012

Apricot-Rye Crumble Bars

I love the cookbook Good to the Grain by Kim Boyce.

The cornflour crust tarts in this book, that I like to call summertime peach tarts, are some of my favourite things to eat.

This book really taught me how to bake with and appreicate the flavour of lots of different types of flours.

You are seriously limiting the flavour in your baking if you are only using all purpose white or whole wheat.

That said, we are going crazy over these bars.

We all love apricots but what really makes these special is the rich, buttery shortbread crust.

Now I'm sure you could use any flour in these but I would highly recommend making them exactly how Kim suggests.

Use rye flour.

My kids loved these.

You are going to want eat these for breakfast, snack and dessert.

Apricot Rye Crumble Bars
(Good to the Grain: Baking with Whole-Grain Flours by Kim Boyce)

For the crust:

1/2 cup rye flour
1 cup all-purpose flour
1/3 cup dark brown sugar
1/2 tsp kosher salt
4 oz (1 stick) unsalted butter, melted and cooled slightly
1 tsp vanilla extract

For the crumble topping:

1 cup oats
3 Tbsp dark brown sugar
1/4 cup plus 2 Tbsp rye flour or other whole-grain flour
1/4 cup all-purpose flour
3 Tbsp sugar
1 tsp kosher salt
3 oz (6 Tbsp) unsalted butter, melted and cooled
For the filling

1 1/2 cups apricot jam


Preheat oven to 275*. Butter the sides and bottom of a 9-inch springform pan.

To make the crust, whisk together the flours, brown sugar, and salt in a large bowl. Add the melted butter and vanilla and stir until thoroughly combined. Using your hands, press the dough evenly into the bottom of the buttered pan. Put the pan in the freezer for 30 minutes while you make the topping.

Add all of the crumble ingredients except the melted butter to a bowl and mix. Add the melted butter and stir with your hands, squeezing the dough as you mix to create small crumbly bits. Set aside.

Bake the frozen crust until golden and firm when touched, 50 to 55 minutes. Remove from the oven and increase the temperature to 350 degrees.
Spread the jam, fruit butter, or compote of your choice over the crust and top with the crumble, evenly sprinkling it over the surface. Bake for 50 to 55 minutes, until golden brown, rotating the pan halfway through for even baking.
When the pan is cool enough to handle but still warm, run a sharp knife around the edge of the crumble bars to loosen any fruit that may have stuck to the pan while baking and remove the ring. Once cool, cut into wedges.